
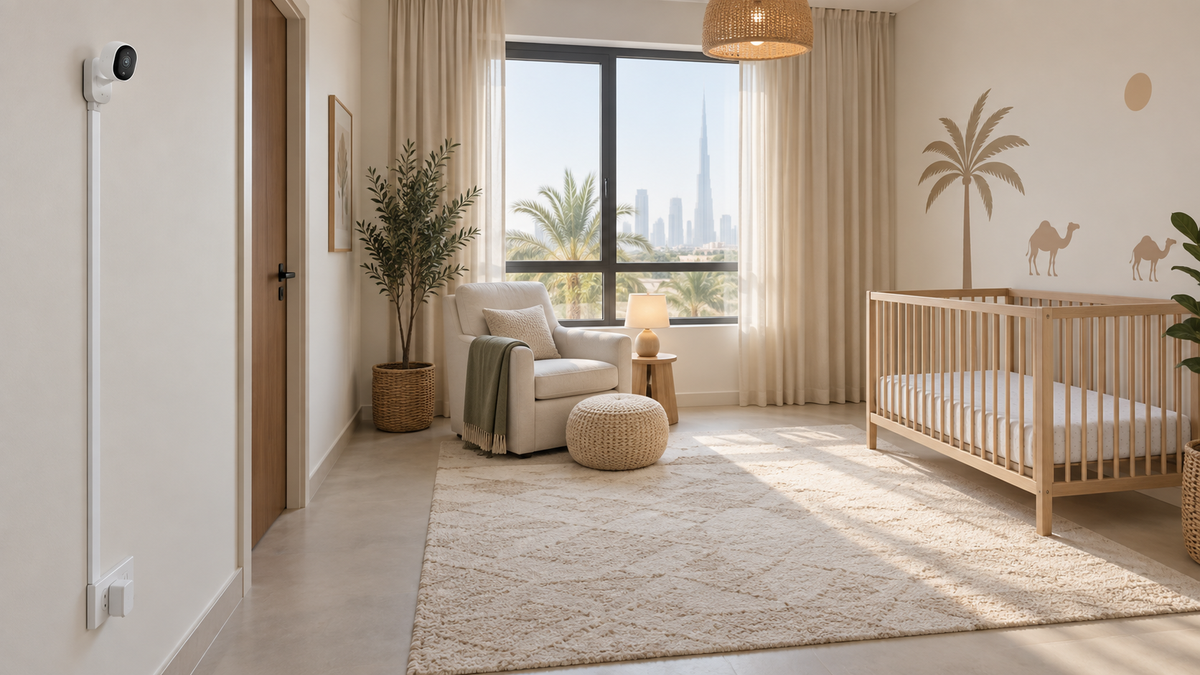
Important safety note
CPSC guidance: place cords at least three feet from every part of the crib, bassinet, play yard or other safe sleep environment; keep all monitor parts out of reach and never position a monitor inside or on the edge of a crib.
Read the original CPSC Safe and Sound Zone alert(opens in a new tab). A monitor is a supervision aid and does not replace direct care or AAP safe-sleep guidance(opens in a new tab).
Choose the position before routing power
- Mark the full three-foot safety boundary from every edge of the sleep space.
- Account for how the child could stand, climb or pull objects as they grow.
- Choose a stable view outside that boundary using manufacturer-approved hardware.
- Plan the entire cord path to a distant outlet with no loops or reachable sections.
- Check the final image by day and night before tightening and covering the route.
Wall mounting
- Use the exact fasteners and wall type specified by the manufacturer; anchors for masonry, plasterboard and block are not interchangeable.
- Do not mount over the crib or on a surface from which the device or a part could fall into it.
- Route power in a fixed cord cover outside the safety boundary and keep the adapter inaccessible.
- Leave ventilation openings clear and avoid hot, damp or direct-sun positions.
Furniture mounting
Use only stable furniture that cannot tip and remains outside the child’s reach and three-foot cord boundary. Do not balance the camera on stacked books, a narrow rail, a soft surface or furniture that will be moved.
Crib and flexible mounts
Do not attach the camera or cord to the crib. A clamp, flexible stem or wraparound mount can loosen, shift or become reachable. Use only a manufacturer-approved installation that still satisfies the CPSC distance and out-of-reach guidance.
Cord-routing checklist
| Check | Pass condition |
|---|---|
| Distance | At least three feet from every part of the sleep space |
| Reach | No cable, adapter, cover edge or monitor part can be reached |
| Loops | No dangling or growing loop |
| Fixing | Cord cover and mount remain fully secured |
| Outlet | Adapter is stable, ventilated and inaccessible |
| Growth | Setup remains safe when the child stands or furniture moves |
Camera angle and visibility
Aim to see the full relevant sleep area without placing equipment closer. Pan/tilt can help with framing; digital zoom cannot create detail that was not captured. Avoid reflections from windows or glossy rails in infrared mode.
Test low-light framing with the night-vision guide.
Check the installation periodically
- Recheck mount screws, adhesive or manufacturer-approved fixing points.
- Inspect cord covers, connectors, cable damage and adapter heat.
- Reassess reach whenever the child grows, stands, climbs or furniture moves.
- Stop using damaged equipment and follow authorised service instructions.
Common unsafe improvisations
- Putting the camera on or inside the crib for a closer view.
- Running a loose cable down crib bars or behind a reachable curtain.
- Using tape, improvised clips or stacked objects as the primary mount.
- Placing a power bank, extension lead or adapter beside the sleep space.
- Assuming a wireless video link means the camera has no power cord.
Final recommendation
Treat the three-foot cord distance as a minimum, not a target. Choose a stable position farther away whenever the room allows, secure the full route and recheck it as the child’s reach changes.
Use these rules while choosing a system in How to Choose a Baby Monitor, review connected-device controls in the privacy guide and compare products only after the room has a safe plan in Top 10 Baby Monitors in UAE.